“`html
Why Anchor Winches Fail on Long Passages
As someone who spent three seasons working on commercial trawlers before buying my own 42-foot Kadey-Krogen, I learned everything there is to know about anchor winch failures the hard way. Stranded in a muddy Tennessee River anchorage with a seized motor and no cell service, I discovered something crucial: trawler anchor winch failures during Great Loop passages aren’t random mechanical breakdowns. They’re the direct result of operational stress patterns that shoreside cruisers never experience.
Your winch motor wasn’t designed for what the Great Loop demands. Every day brings something different — shallow, muddy anchorages, frequent relocations, unfamiliar holding grounds where you’re testing bottom conditions by feel. You deploy the anchor, recover it, move 200 yards, and repeat the cycle five times before finding a spot that holds. That’s not normal anchoring. That’s diagnosis anchoring.
The electrical demand stacks fast. A typical anchor winch motor draws 80 to 120 amps on full deployment. Bank your batteries at 50% state of charge (which happens by day two of remote cruising), and you’re pulling current from depleted cells. Voltage sags below 11.8V. The motor struggles. It heats. Thermal cycling — charge, discharge, charge again — degrades winding insulation within weeks.
Salt spray and moisture intrusion make it worse. Running that winch in rain, spray from lock lockages, morning fog. Moisture creeps past corroded terminal connections into the motor housing. Corrosion spreads on the solenoid contacts. Resistance increases. More heat. More stress on brushes already worn thin from constant cycling.
Signs Your Winch Motor Is About to Fail
Grinding noise during retrieval is the first warning sign most skippers miss. Probably should have opened with this section, honestly — it would have saved me a $4,200 motor replacement if I’d recognized it in week two instead of week eight.
That grinding means brush wear. The motor’s carbon brushes are scrubbing unevenly against the commutator. You’ll hear it before you see arcing. Ignore it long enough, and brushes wear through completely. Sparking inside the motor case accelerates everything else. Weeks of waiting for parts at the next major service center becomes your reality.
Slow descent under load tells another story. The winch moves the anchor up at normal speed but drops it like a geriatric’s pace. This points to motor weakness (voltage sag, internal resistance) or solenoid failure on the down-circuit. A functioning solenoid should engage with a sharp click. A failing one chatters — rapid on-off-on engagement. Listen for it.
Thermal smell during or immediately after winching is non-negotiable. Burnt insulation smells like hot plastic and copper. That’s your motor winding overheating. Stop. Let it cool. Check your next steps before you run it again.
The breaker trips unexpectedly during normal operation (not during a hard snag). That’s overcurrent protection doing its job because internal resistance spiked. Could be a partial brush failure. Could be water in the motor case. Could be solenoid contacts welding intermittently. The breaker isn’t the problem — it’s the warning.
Quick visual inspection takes three steps, five minutes:
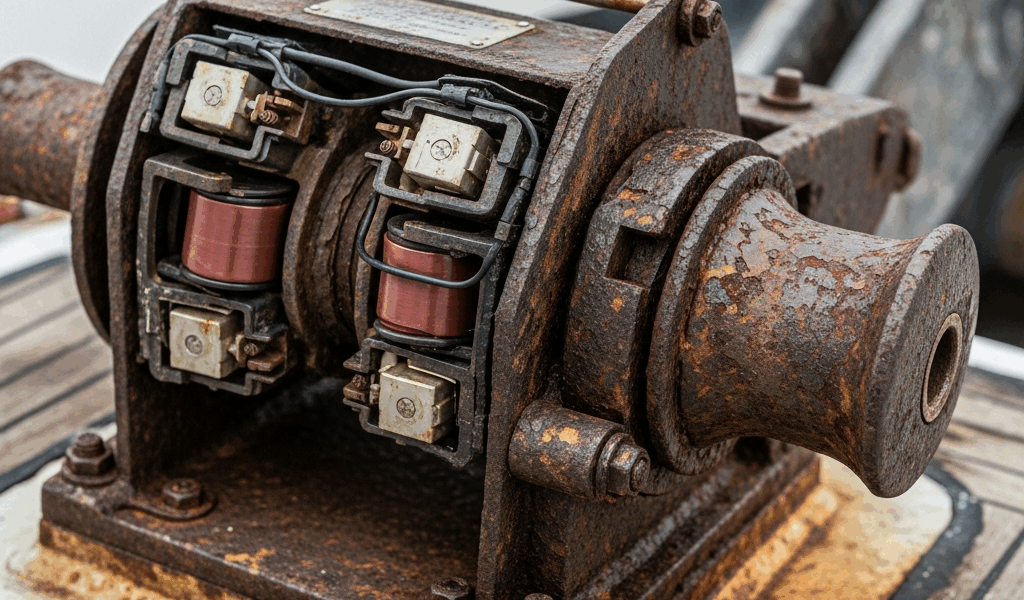
- Remove the motor access cover (usually four bolts). Look at the brushes through the side windows or angle a phone flashlight inside. They should be solid carbon blocks, not worn to nubs or chipped. Worn brushes are less than 1 inch long on most trawler motors.
- Inspect the positive and negative battery terminals running to the winch control panel and motor. Corrosion looks like white or blue crusty buildup. Scrape it off with a plastic brush. If corrosion is heavy (more than surface oxidation), you’ve had moisture intrusion happening for weeks.
- Check cable slack in the drum. Manually rotate the drum by hand without power. It should spin freely with minimal resistance. If it binds or resists suddenly at one point, you’ve got internal brake slippage or a bearing seizing.
Testing Winch Motor and Solenoid Before Failure
You’ll need a basic digital multimeter. Harbor Freight’s $25 model works fine. I carry a Fluke 117, model number 4713629, specifically because it survives getting dropped on teak decking.
Set the multimeter to DC volts. First test: battery bank voltage under no load. Should read 13.2V to 13.8V when the generator is running and batteries are at 100% state of charge. This is your baseline.
Now run the winch motor. Measure the voltage at the motor terminals (not the battery) during retrieval under load. It should drop to 12.0V minimum. If it falls below 11.5V, you’re in the danger zone — the motor is starving for current. Thermal stress accelerates. This is where weak alternator output, bad battery connections, or undersized battery banks reveal themselves.
Switch to DC amps mode. Clamp the meter around the positive battery cable running to the winch. Full deployment should draw 80 to 120 amps. If it’s drawing 140 or more amps on normal retrieval (not fighting a snag), the motor is struggling internally. Resistance is high. Internal short or brush damage is likely.
Test the solenoid separately. With shore power connected (safest option), turn off the main battery disconnect. Connect your multimeter across the solenoid coil terminals. Switch the winch control to “down.” You should hear a crisp click and read 12V across the coil. No click? No voltage? The solenoid coil is open-circuit — replace it.
If the solenoid chatters (clicks repeatedly instead of holding), the coil is weak or the contacts are pitted. Grab a small brush and inspect the contact surfaces inside the solenoid if it’s removable. Pitting looks like little craters. Light pitting can be cleaned. Heavy erosion means replacement.
Battery-only testing without shore power is riskier. Disconnect the battery negative terminal first. Attach your multimeter. This prevents accidental short circuits during testing.
Field Repairs and Temporary Workarounds
Stranded in a lock system with a dead winch — that’s the reality for dozens of Great Loop boats every season. You have three immediate options.
Manual hand-crank backup: Most trawler winches come with a hand-crank handle (often stowed in the lazarette). It’s slow — manual retrieval on 200 feet of chain takes 15 to 20 minutes. But it works in a narrow lock or emergency anchorage. Test it now, while the motor still runs. Make sure the handle is still aboard and the crank shaft rotates freely. I’ve met skippers who discovered their handle was missing 800 miles into the Loop.
A seized motor that won’t hand-crank at all means the brake is welded or there’s internal binding. Don’t force it — you’ll snap the crank shaft or damage the gearbox.
Limp-to-service versus DIY replacement: If you’re two days away from a major service center (Memphis, Nashville, Chicago), limp there. Use the hand crank for daily anchoring. Don’t risk accelerating the failure by running a compromised motor repeatedly.
If you’re in remote water and need the winch working today, solenoid replacement is often DIY-feasible. The solenoid is a bolt-on component, usually accessible from the side of the motor housing. It’s a $400 to $700 part depending on your model. Nordhavn and Kadey-Krogen both have dealer networks in major Great Loop hubs (Chicago, Memphis, Louisville). Call ahead — most dealers can overnight a solenoid to a marina. You remove four bolts, swap it, reinstall. Takes 20 minutes if connections are accessible.
Motor replacement in the field is harder. A full motor swap requires pulling the entire winch assembly, which usually means hauling or drop-lifting the boat. Not field-feasible unless you’re near a facility with heavy marine lift capacity.
Preventive maintenance schedule is where the cheap insurance lives:
- Every 100 winch cycles (roughly every two weeks on the Loop), grease the motor bearings. Use a grease gun with marine-grade lubricant — two shots per bearing location. Dried bearings generate heat.
- Monthly visual inspection checks brush wear, corrosion on terminals, and cable slack in the drum.
- Quarterly load testing measures voltage and amperage under full deployment as outlined above.
- Seal all exposed connectors with dielectric grease after inspection. This prevents moisture creep into terminal crimps.
- Clean the motor cooling fins with a soft brush quarterly. Salt spray deposits insulate the motor, trapping heat.
Choosing a Rebuild vs. Full Replacement
A Nordhavn 55’s original-equipment winch motor (usually a Lewmar 500 or equivalent) costs $2,200 to $2,800 new. Rebuilt motors run $1,400 to $1,800 with a 12-month warranty. Solenoid replacement alone is $400 to $600 installed.
Lead times are brutal on the Loop. New motors from manufacturer stock can take 6 to 12 weeks. Rebuilt stock at dealers (Chicago-area shops have the best inventory) ships in 3 to 5 days. This matters when you’re in early November heading for the Gulf.
If your winch is original equipment from 2010 or earlier, you’re running a motor never designed for continuous-duty cruising. Duty-cycle specs for vintage trawler winches assumed 50 annual deployments, not 50 per week. Upgrade to a higher-amperage motor if you’re replacing — a 150-amp motor versus the original 120-amp unit costs $400 more installed but adds real margin on voltage sag during heavy chain retrieval.
Rebuild economics make sense if your motor is post-2012 and the failure was solenoid-only or brush-related. Full internal inspection happens during rebuild. You get fresh brushes, cleaned commutator, fresh bearings. If the failure involves winding damage or core corrosion, replacement is safer than rebuild.
Sourcing parts during remote cruising means relationships. Build them before you need them. Email three Kadey-Krogen dealers now. Tell them your boat’s winch model and your planned cruising schedule. Get their lead-time expectations in writing. That email takes five minutes and might save you six weeks of limping.
“`




Stay in the loop
Get the latest passage maker mag updates delivered to your inbox.